
This blog explains how to prepare for a successful intraoral scan for implants in a concise manner. Especially when you are new to the equipment, having check points helps to grow accustomed to the scanner.
The last thing you want to do after introducing awesome new technology to the office is improperly scan an implant. Therefore, keep this information in mind each time you prepare for scanning.
Before scanning the scan body, make sure it is fixed correctly to the fixture.
Let us clarify what a scan body is. A scan body is a marker that allows CAD software to identify the location and insertion direction – or angle – of an implant fixture in the mouth. It is usually called a scan body scan or an in-scan marker.
When scanning the scan body, if it isn’t correctly fixed to the fixture, you will get a mismatched abutment.
Now back to the process.
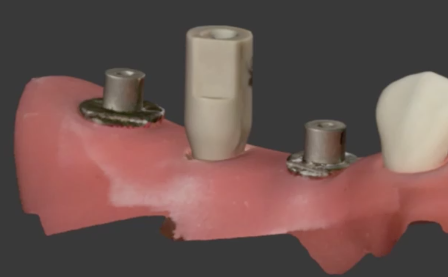
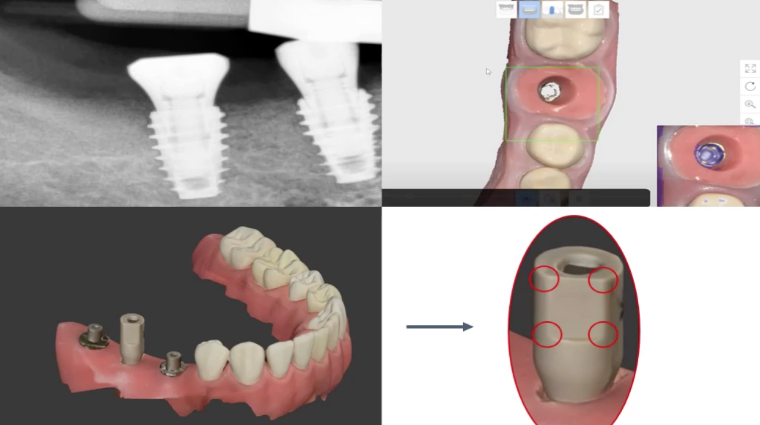
Place the scan body like the lab analogue implanted on the master cast, or a crown on a fixture, and then scan the area. When working with Medit's i500 intraoral scanner and its scan software this will match the data information with a 3-dimensional marker image called ‘the library.’ This allows the scan file to carry the information about the fixture position relative to the master cast. The information is then used for CAD.
After scanning, check if the matching points on the scan body required for the design were scanned properly.
Honestly, you have two simple steps!
First, after placing the scan body on the fixture, check to see if it was fixed appropriately.
Second, check the scan body matching points.
And that is all! You can check out a video-version of this blog by clicking here or under the 'learning' section on the website. Happy scanning.